I saw a comment on a salt dough video on Youtube, where someone had written:
In the forewords below, I've mapped out what I believe are the major anomalies and how to avoid them. I've also experimented with colours and perfumes, using organic kitchen cupboard ingredients.
'This is the first salt dough recipe I've come across that didn't make me want to tear my hair out!'.Having read a fair few recipes before I watched the video I can empathise. As with all things internet, there is a good deal of 'cut and paste' and you do get a certain suspicion that salt dough is an exercise in creative writing rather than actual creation.
In the forewords below, I've mapped out what I believe are the major anomalies and how to avoid them. I've also experimented with colours and perfumes, using organic kitchen cupboard ingredients.
So let's get started.
A FOREWORD ON INGREDIENTS, BAKING, AND THICKNESS OF DOUGH
The standard US recipe you'll find across the internet for salt dough is that by volume i.e. cups, you will need twice as much flour as salt but you will also find some, including non-US, recipes that suggest identical amounts of each. This anomaly I believe occurs because salt is twice as dense as flour, so directly converting cups to ounces or grams causes confusion.

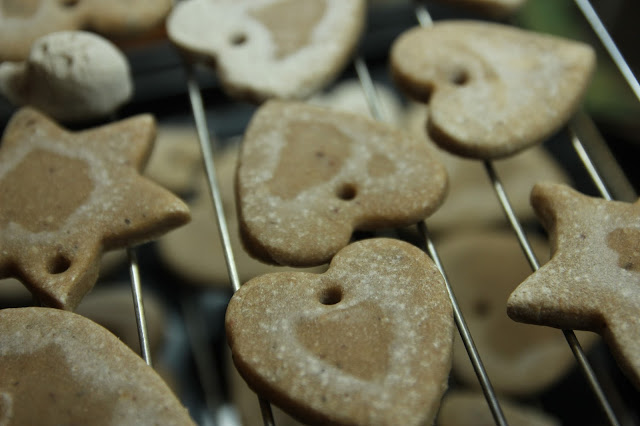
Similarly with thicknesses, in some cases there seems to be a disconnect between actual dimensions as opposed to estimations and/or perceptions. It is a good idea to read the comments of any recipe you chose to adopt/adapt. I took ¼ of an inch (6mm) at face value on my first cinnamon batch. In effect it was way too thick and took ages to dry even in my oven. I saw elsewhere someone on a blog remarking that they too had followed the same advice and the dough took 1 week to air-dry and 24 hours in the oven! That said, after they had dried they looked and smelled like real spice cookies (see above)!
The second batch I made, I rolled to ⅛ of an inch (3mm). These dried in around 3 to 4 hours on a low heat in the oven.
A FOREWORD ON DRYING TIMES & BAKING EQUIPMENT
Baking Paper or Flour?
Many sites recommended some sort of baking paper to stop the saltdough from sticking. I started by using my usual waxed ecological baking paper but I found this gave the one side of the biscuit that was in direct initial contact with the paper, a wavy appearance, which is not
altogether displeasing. However, by dusting the cooking tray with flour and then placing the salt dough shapes directly onto the tray I avoided that problem.
Baking Tray & Wire Rack Combination
I found in baking the salt dough, that once the biscuits/cookies released easily from the cooking tray with the aid of a fish slice, I could then turn them over and dry the other side. This definitely cut the drying time and particularly if I continued to turn them several times. I also found that once the shapes were reasonably 'rigid', I could place them on a wire rack and that this would speed up the drying process even more.
For optimal even drying, I found 120°C - 250°F to be the best.
If the temperature rises to say 150°C - 300°F, then the ornaments will begin to cook rather than dry and they will maybe 'puff up', creating a not displeasing 3D effect and they will also darken in colour. Again you should experiment with one or two ornaments at this temperature to see if it works, you will certainly get them ready for decorating more quickly, however you will need to survey them otherwise you can end up with overcooking or burning them! You also don't want them to dry too quickly as this may cause them to crack at a later date, in particular if your dough was not mixed/kneaded well enough at the outset. You can however troubleshoot this with the ubiquitous glue gun!
TEMPERATURES
For optimal even drying, I found 120°C - 250°F to be the best.
If the temperature rises to say 150°C - 300°F, then the ornaments will begin to cook rather than dry and they will maybe 'puff up', creating a not displeasing 3D effect and they will also darken in colour. Again you should experiment with one or two ornaments at this temperature to see if it works, you will certainly get them ready for decorating more quickly, however you will need to survey them otherwise you can end up with overcooking or burning them! You also don't want them to dry too quickly as this may cause them to crack at a later date, in particular if your dough was not mixed/kneaded well enough at the outset. You can however troubleshoot this with the ubiquitous glue gun!
INGREDIENTS
This is the basic recipe I used and it worked for me:
1 cup of flour = 140g of = 4½ oz
¾ cup of hot water = 240ml = ½ a pint
½ cup of salt = 150g = 5oz
I was given 50 kilos of sell-by-date organic flour, which both the chickens and on rare occasions ourselves, have been consuming in loaf form. We have also been making it into paint (see link below). For the salt, well we live a stone's throw away from one of the major sea salt producing areas of France, so large chunky coarse sea salt is no problem. I did experiment with adding the salt to the hot water but this made a saturated solution, with a goodly amount of salt at the bottom of the water, so I ground the salt with a pestle and mortar. With regards to the amount of spice for say cinnamon salt dough the
recommendations are around 1 cup of cinnamon .i.e. 140g. As I'm using
organic ingredients, there is no way I'm using that much spice when I
need it for cooking. For the cinnamon, I used one of my precious organic 3 Cinnamon Tea teabags.
By steeping the teabag in the boiling water and letting it stand for a while, I obtained a good rich gingerbread colour.
And this is what it looked like after 20 minutes.
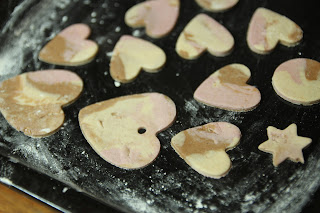
For the pink dough, I used dried hibiscus tea flowers, steeped in warm water.
For the chocolate, I used 1 heaped teaspoon of cocoa per the basic salt dough recipe above.
I also made a turmeric and ginger variation with just a sprinkle of paprika (around the same volume in total as for the cocoa).
However, I decided to glaze my ornaments with a glue glaze and as I was pressed for time I went out and bought a craft PVA glue. I mixed it at a ratio of :
2 parts glue to 1 part water.
I then used a paint brush to apply it to the biscuits. I also added a touch of cocoa powder to one batch. I'm not sure if it was the glaze itself or the cocoa in the biscuit but it made the PVA go stringy, so I rubbed it in with a cotton bud. This gave the ornament/biscuit a rich dark chocolate colour and the smell was pretty good too!
With the spices and hibiscus biscuits, I just used the basic PVA glaze recipe and this, on drying brought out the shine of the salt crystals in the dough and gave natural sparkle to the ornaments which was very satisfying.
1 part salt to 1 part flour by volume.
When it dried, I was left with a frosting that resembled snow on the edge of a roadside after the snowplough has been through. However, I persevered and added a coat of my glue glaze over the top and once it was dry it lost the grimy snow look!
METHOD
Add your flour and salt and mix well. If you use raw sea salt, as I did, you will need to grind it up first.
Add the spices and mix again.
Add the hot water slowly until you get a stiff dough, neither crumbly nor too sticky.
Knead
the dough until it feels elastic and well-mixed - some recipes suggest
kneading for 5 to 10 minutes. I have to admit that I didn't knead it for
this long!
Put a piece of baking paper on your counter top, table or bread board and sprinkle it with a little flour.
Roll
dough out to an ⅛ of an inch (3mm). You are now ready to cut out your
shapes. As previously discussed, at this thickness the ornaments will dry in around 3 to 4 hours
on a low heat in the oven.
I used a drinking straw to make the hole for the ribbon or jute hanger.
GLAZES & ICING
GLUE GLAZE
As the ornaments dry, the salt will leave a white residue on the top of the biscuit crust, I didn't find that a problem aesthetically, as it resembles icing sugar.However, I decided to glaze my ornaments with a glue glaze and as I was pressed for time I went out and bought a craft PVA glue. I mixed it at a ratio of :
2 parts glue to 1 part water.
I then used a paint brush to apply it to the biscuits. I also added a touch of cocoa powder to one batch. I'm not sure if it was the glaze itself or the cocoa in the biscuit but it made the PVA go stringy, so I rubbed it in with a cotton bud. This gave the ornament/biscuit a rich dark chocolate colour and the smell was pretty good too!
With the spices and hibiscus biscuits, I just used the basic PVA glaze recipe and this, on drying brought out the shine of the salt crystals in the dough and gave natural sparkle to the ornaments which was very satisfying.
SALT DOUGH ICING
Raw sea salt does not make a pristine white icing, well not at first. I used:1 part salt to 1 part flour by volume.
When it dried, I was left with a frosting that resembled snow on the edge of a roadside after the snowplough has been through. However, I persevered and added a coat of my glue glaze over the top and once it was dry it lost the grimy snow look!
FINDING SUITABLE CUTTERS AND SHAPES
I'd already purchased a set of cutters on Amazon, (see below) because here in rural France, it is one thing we are short on. I could only get plastic at my local stores and the stainless steel ones were really expensive.
FINISHING
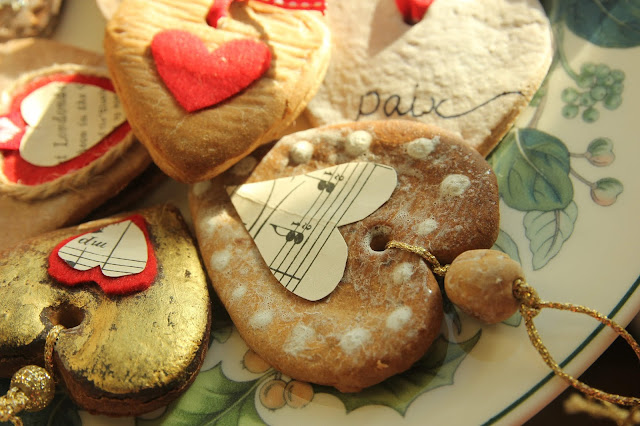
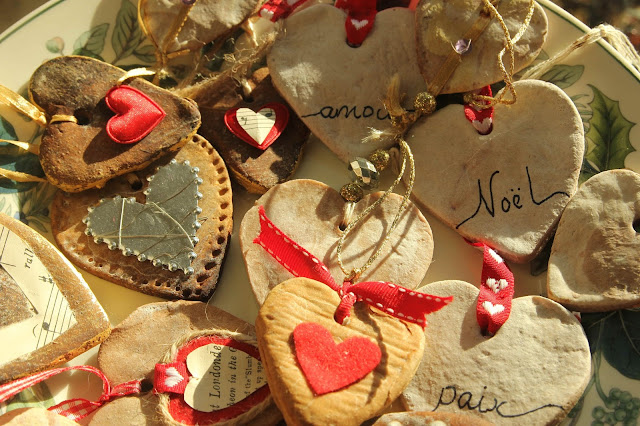
I used a glue gun to stick on some extra sparkly bits and as I love découpage I used old sheet music, felt and handmade paper scraps from other projects. I also added a touch of glitter to the chocolate ornaments with some faux gold poster paint. I applied it sparingly with a brush and then burnished it in with a piece of cloth.
In Part Two, I'll look at some more experiments I made with salt dough, including a marbling effect, cards and hand cutting shapes.
Enjoy!
Hope to see you here again for another recipe from an old farmhouse in Normandie,
All the best,
Sue
Home-made Ecological Paint for Interior Walls Part 1 Making Wheat Paste
Ecological paint, like a good organic food recipe is made up of just the basic necessary ingredients, it is simple ...read more


